使用 WebAssembly 进行扩展开发 - 第二部分
2024年6月7日 作者:Dirk Bäumer
在之前的博客文章中,我们讨论了如何使用WebAssembly进行扩展开发,我们展示了组件模型如何用于将WebAssembly代码集成到你的Visual Studio Code扩展中。在本文中,我们重点介绍两个额外的独立用例:(a) 在work中运行WebAssembly代码,以避免阻塞扩展主机的主线程,(b) 使用编译为WebAssembly的语言创建语言服务器。
要运行此博客文章中的示例,您需要以下工具:VS Code,Node.js,Rust 编译器工具链,wasm-tools,和 wit-bindgen。
在工作线程中执行 WebAssembly 代码
上一篇文章中的示例在 VS Code 扩展主机的主线程中运行了 WebAssembly 代码。只要执行时间短,这就没有问题。然而,长时间运行的操作应在一个 worker 线程中执行,以确保扩展主机的主线程可以为其他扩展可用。
VS Code 组件模型提供了一个元模型,通过在工作器和扩展主侧自动生成必要的粘合代码,使这一过程更加容易。
以下代码片段显示了工人所需的代码。示例假定代码存储在名为的文件中工人.ts输入::
import { Connection, RAL } from '@vscode/wasm-component-model';
import { calculator } from './calculator';

async function main(): Promise<void> {
  const connection = await Connection.createWorker(calculator._);
  connection.listen();
}

主().捕获(RAL().控制台.错误);
代码创建了一个与扩展主机主工作线程通信的连接,并初始化了与该连接。计算器世界由...生成 wit2ts工具。
在扩展侧,我们加载WebAssembly模块并将其绑定到计算器世界也是如此。需要等待相应的调用执行计算,因为这些计算在工作线程中异步执行(例如,等待 api.calc(...))。
// The channel for printing the result.
const channel = vscode.window.createOutputChannel('Calculator');
context.subscriptions.push(channel);

// The channel for printing the log.
const log = vscode.window.createOutputChannel('Calculator - Log', { log: true });
context.subscriptions.push(log);

// The implementation of the log function that is called from WASM
const service: calculator.Imports.Promisified = {
  log: async (msg: string): Promise<void> => {
    // Wait 100ms to slow things down :-)
    await new Promise(resolve => setTimeout(resolve, 100));
    log.info(msg);
  }
};

// Load the WASM model
const filename = vscode.Uri.joinPath(
  context.extensionUri,
  'target',
  'wasm32-unknown-unknown',
  'debug',
  'calculator.wasm'
);
const bits = await vscode.workspace.fs.readFile(filename);
const module = await WebAssembly.compile(bits);

// Create the worker
const worker = new Worker(
  vscode.Uri.joinPath(context.extensionUri, './out/worker.js').fsPath
);
// Bind the world to the worker
const api = await calculator._.bind(service, module, worker);

vscode.commands.registerCommand(
  'vscode-samples.wasm-component-model-async.run',
  async () => {
    channel.show();
    channel.appendLine('Running calculator example');
    const add = Types.Operation.Add({ left: 1, right: 2 });
    channel.appendLine(`Add ${await api.calc(add)}`);
    const sub = Types.Operation.Sub({ left: 10, right: 8 });
    channel.appendLine(`Sub ${await api.calc(sub)}`);
    const mul = Types.Operation.Mul({ left: 3, right:7
});
    channel.
appendLine(`Mul ${await api.calc(mul)})`);
    const div = Types.Operatiion.Div({ left: 10, right: 2 });
    channel.
appendLine(`Div ${await api.calc(div)})`);
  }
有几个重要的事项需要注意:
- 这个示例中使用的WIT文件与计算器示例中使用的文件在之前的博客文章中没有任何区别。
- 由于WebAssembly代码的执行是在一个工人中进行的,因此导入的服务的实现(例如,
日志函数 above) 可以返回一个承诺, 但不一定要这样。 - WebAssembly目前仅支持同步执行模型。因此,每个从执行WebAssembly代码的工人到扩展主机主线程调用导入的服务的调用需要以下步骤:
- 发布一条消息到扩展主机的主线程,描述要调用的服务(例如,调用
日志函数)。 - 暂停工人执行使用
原子等待输入:. - 在扩展主机的主线程中处理消息。
- 恢复工人并使用通知它结果
Atomics.notify输入:.
- 发布一条消息到扩展主机的主线程,描述要调用的服务(例如,调用
这种同步会增加可测量的时间开销。尽管所有这些步骤都由组件模型透明地处理,但开发人员应了解这些步骤,并在设计导入的API接口时加以考虑。
你可以在这个示例的完整源代码在VS Code 扩展示例仓库中找到。
一个基于WebAssembly的编程语言服务器
当我们开始为VS Code for the Web实现WebAssembly支持时,我们设想的一个使用案例是使用WebAssembly执行语言服务器。随着VS Code的LSP库的最新更改以及引入了一个将WebAssembly和LSP连接的新模块,现在实现一个WebAssembly语言服务器与实现一个操作系统进程一样简单。
此外,WebAssembly 语言服务器运行在 WebAssembly Core Extension 上,完全支持 WASI Preview 1。这意味着语言服务器可以使用其编程语言的常规文件系统 API 访问工作区中的文件,即使这些文件存储在远程位置,例如在 GitHub 仓库中。
以下代码片段展示了基于示例服务器的Rust语言服务器lsp服务器crate。这个语言服务器不进行任何语言分析,而是简单地返回一个预定义的结果。转到定义请求:
match cast::<GotoDefinition>(req) {
    Ok((id, params)) => {
        let uri = params.text_document_position_params.text_document.uri;
        eprintln!("Received gotoDefinition request #{} {}", id, uri.to_string());
        let loc = Location::new(
            uri,
            lsp_types::Range::new(lsp_types::Position::new(0, 0), lsp_types::Position::new(0, 0))
        );
        let mut vec = Vec::new();
        vec.push(loc);
        let result = Some(GotoDefinitionResponse::Array(vec));
        let result = serde_json::to_value(&result).unwrap();
        let resp = Response { id, result: Some(result), error: None };
        connection.sender.send(Message::Response(resp))?;
        continue;
    }
    Err(err @ ExtractError::JsonError { .. }) => panic!("{err:?}"),
    Err(ExtractError::MethodMismatch(req)) => req,
};
你可以在VS Code 示例仓库中找到语言服务器的完整源代码。
您可以使用新的@vscode/wasm-wasi-lspnpm 模块,用于在扩展的 TypeScript 代码中创建 WebAssembly 语言服务器。通过使用 WebAssembly Core Extension 实现支持 WASI 的 WebAssembly 代码实例化为 worker,这在我们 在 VS Code for the Web 中运行 WebAssemblies 博客文章中有详细描述。
扩展的 TypeScript 代码也很简单。它为纯文本文件注册服务器。
import {
  createStdioOptions,
  createUriConverters,
  startServer
} from '@vscode/wasm-wasi-lsp';

export async function activate(context: ExtensionContext) {
  const wasm: Wasm = await Wasm.load();

  const channel = window.createOutputChannel('LSP WASM Server');
  // The server options to run the WebAssembly language server.
  const serverOptions: ServerOptions = async () => {
    const options: ProcessOptions = {
      stdio: createStdioOptions(),
      mountPoints: [{ kind: 'workspaceFolder' }]
    };

    // Load the WebAssembly code
    const filename = Uri.joinPath(
      context.extensionUri,
      'server',
      'target',
      'wasm32-wasip1-threads',
      'release',
      'server.wasm'
    );
    const bits = await workspace.fs.readFile(filename);
    const module = await WebAssembly.compile(bits);

    // Create the wasm worker that runs the LSP server
    const process = await wasm.createProcess(
      'lsp-server',
      module,
      { initial: 160, maximum: 160, shared: true },
      options
    );

    // Hook stderr to the output channel
    const decoder = new TextDecoder('utf-8');
    process.stderr!.onData(data => {
      channel.append(decoder.decode(data));
    });

    return startServer(process);
  };

  const clientOptions: LanguageClientOptions = {
    documentSelector: [{ language: 'plaintext' }],
    outputChannel: channel,
    uriConverters: createUriConverters()
  };

  让 客户端 = 新的 LanguageClient('lspClient', 'LSP Client', 服务器选项, 客户端选项);
  等待 客户端.开始();
}
运行代码添加了一个转到定义进入纯文本文件的上下文菜单。执行此操作会向LSP服务器发送相应的请求。
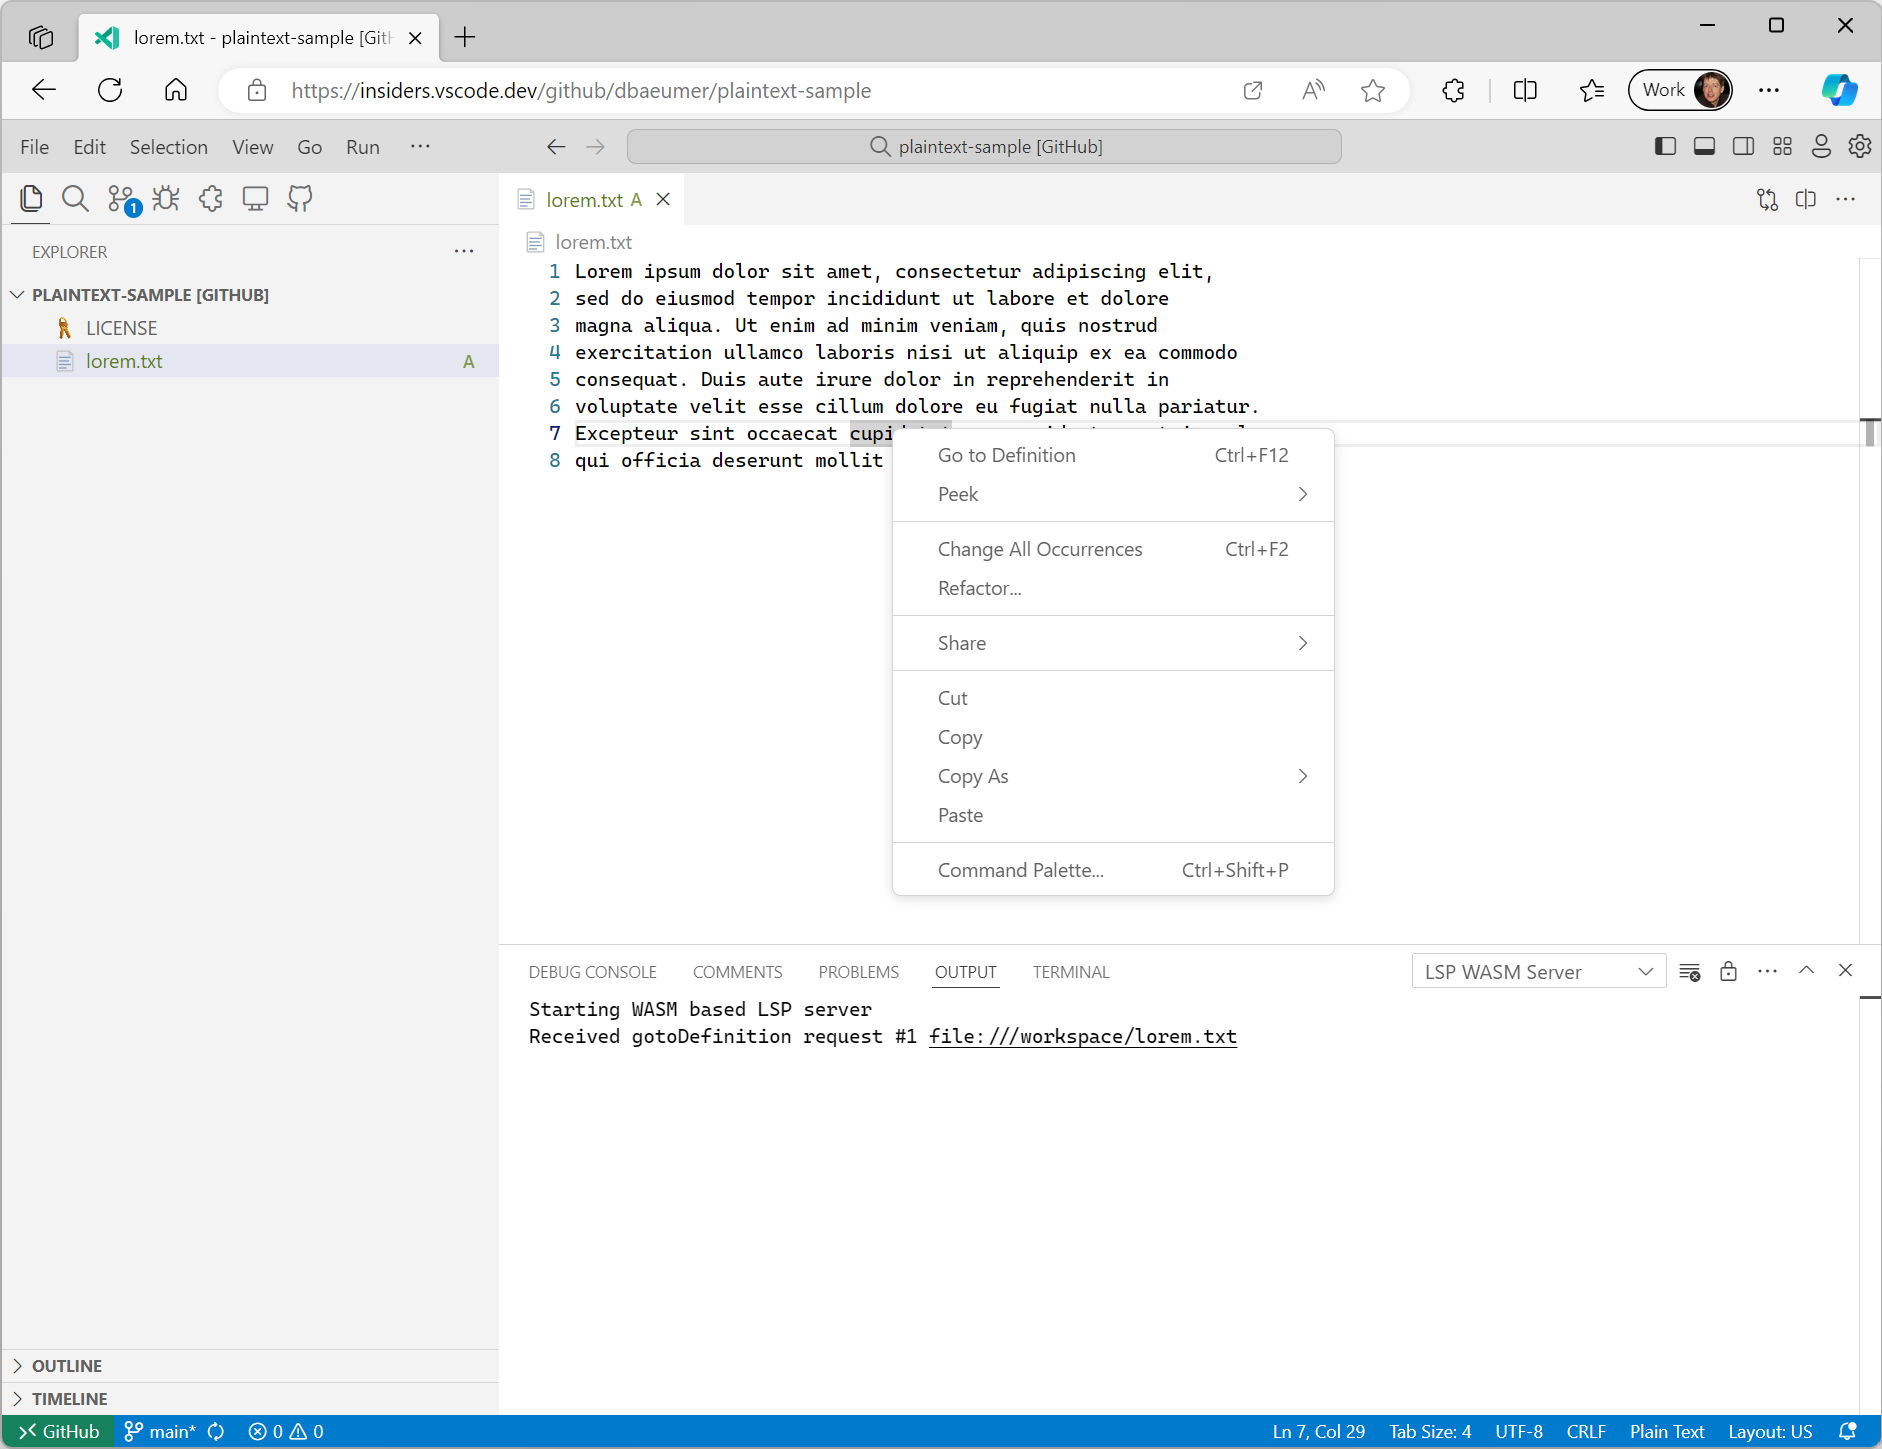
需要注意的是@vscode/wasm-wasi-lspnpm 模块会自动将文档的 URIs 从其在工作区的值转换为在 WASI Preview 1 主机中被识别的值。在上面的示例中,VS Code 中文本文档的 URI 通常类似于vscode-vfs://github/dbaeumer/plaintext-sample/lorem.txt,这个值被转换成文件:///工作区/lorem.txt,这在WASI主机中被识别。当语言服务器将URI发送回VS Code时,此转换也会自动发生。
大多数语言服务器库支持自定义消息,这使得为语言服务器添加已经在语言服务器协议规范中不存在的功能变得很容易。以下代码片段展示了如何为之前使用的Rust语言服务器添加一个自定义消息处理器,用于统计给定工作区文件夹中的文件数量:
#[derive(Debug, Eq, PartialEq, Clone, Deserialize, Serialize)]
#[serde(rename_all = "camelCase")]
pub struct CountFilesParams {
pub folder: Url,
}
pub enum CountFilesRequest {}
impl Request for CountFilesRequest {
type Params = CountFilesParams;
type Result = u32;
const METHOD: &'static str = "wasm-language-server/countFilesInDirectory";
}
//...
for msg in &connection.receiver {
match msg {
//....
match cast::<CountFilesRequest>(req) {
Ok((id, params)) => {
eprintln!("Received countFiles request #{} {}", id, params.folder);
let result = count_files_in_directory(¶ms.folder.path());
let json = serde_json::to_value(&result).unwrap();
let resp = Response { id, result: Some(json), error: None };
connection.sender.send(Message::Response(resp))?;
continue;
}
Err(err @ ExtractError::JsonError { .. }) => panic!("{err:?}"),
Err(ExtractError::MethodMismatch(req)) => req,
}
}
//...
}
```rust
fn count_files_in_directory(path: &str) -> usize {
WalkDir::new(path)
.into_iter()
.filter_map(Result::ok)
.filter(|entry| entry.file_type().is_file())
.count()
}
```
用于向LSP服务器发送此自定义请求的TypeScript代码如下所示:
```plaintext
const folder = workspace.workspaceFolders![0].uri;
const result = await client.sendRequest(CountFilesRequest, { folder: client.code2ProtocolConverter.asUri(folder) });
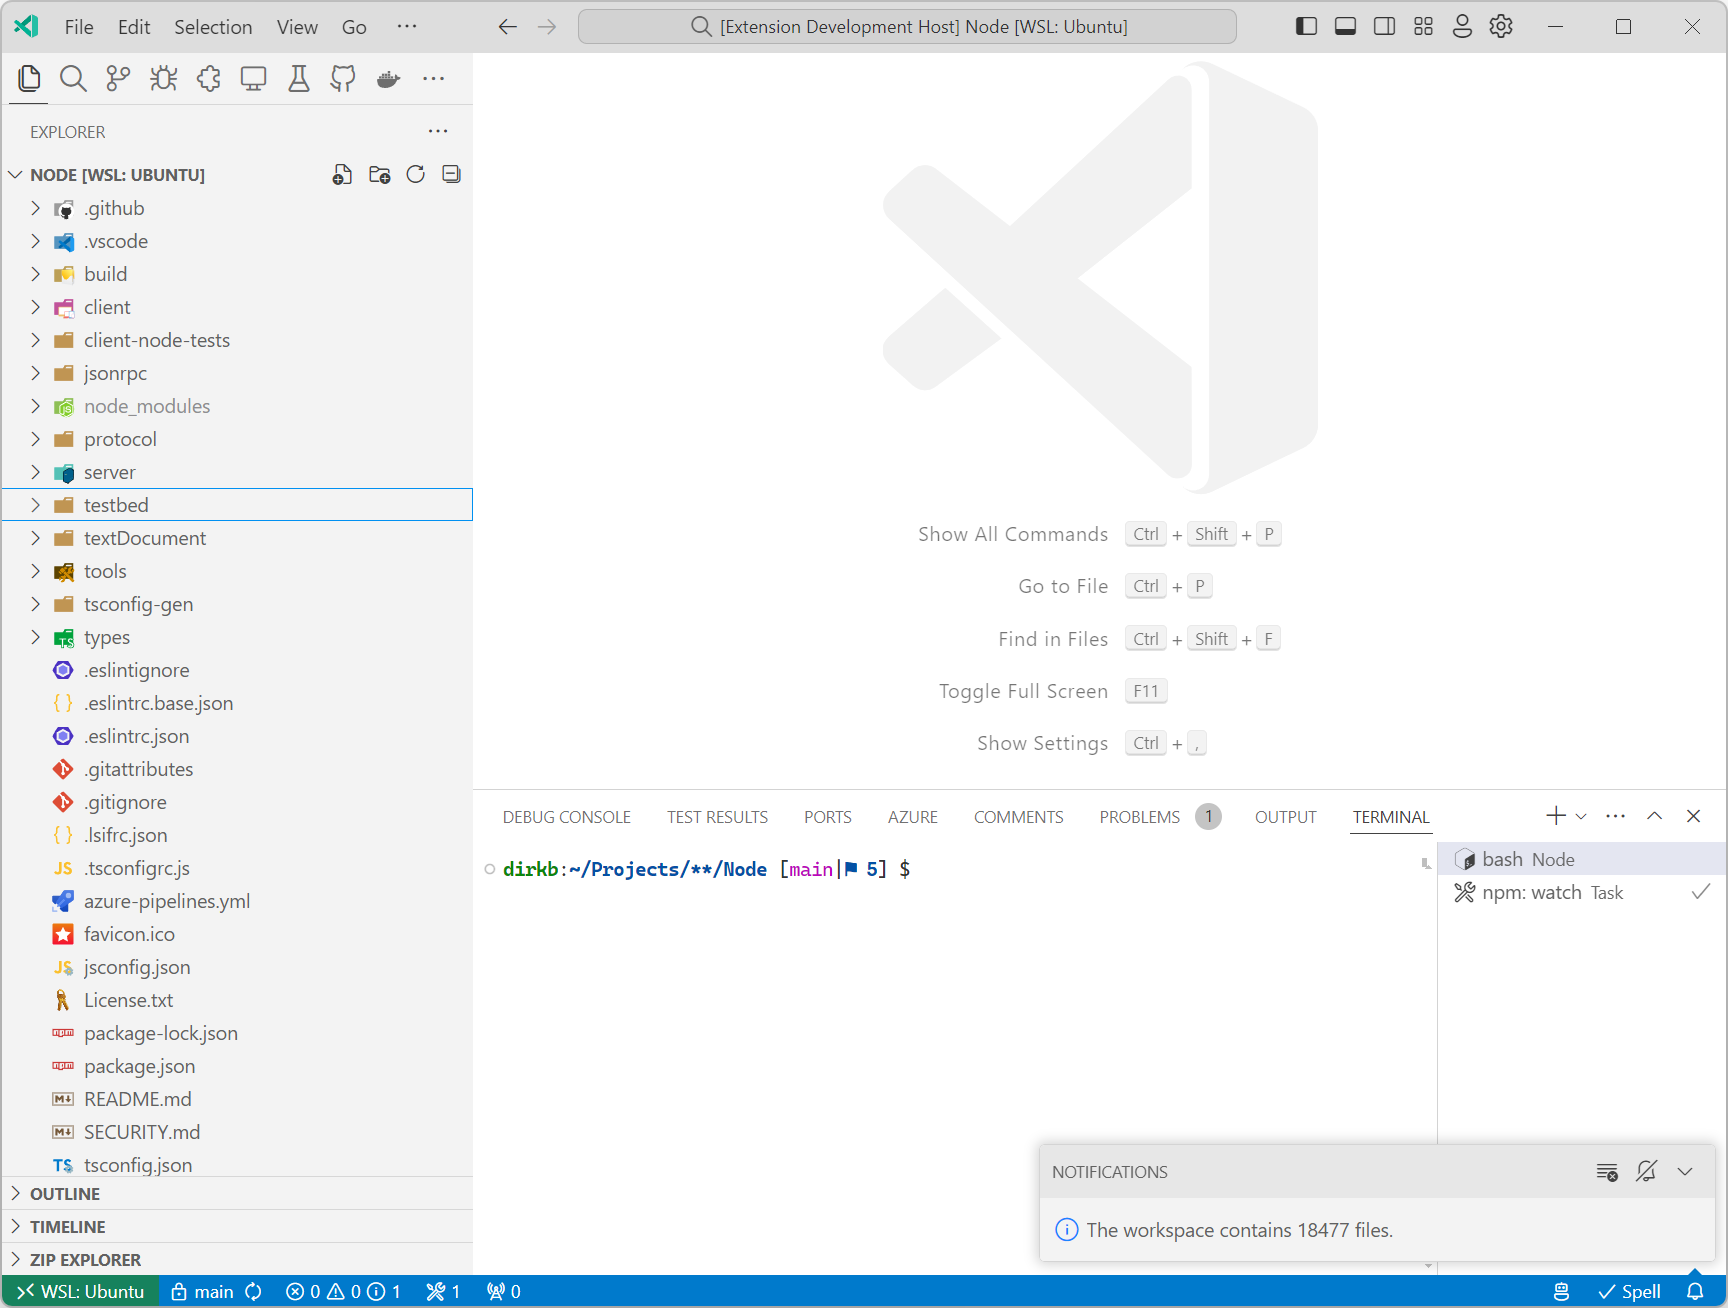
window.showInformationMessage(`The workspace contains ${result} files.`);
```
运行这个在vscode语言服务器仓库显示以下通知:
请注意,语言服务器不一定需要实现语言服务器协议规范中指定的任何功能。如果一个扩展希望集成只能编译到WASI Preview 1目标的库代码,直到VS Code在其组件模型实现中支持WASI 0.2预览版之前,实现一个带有自定义消息的语言服务器可能是一个好选择。
接下来是什么
正如之前博客中提到的,我们继续努力为VS Code实现WASI 0.2预览版。我们还计划扩展代码示例,包括编译为WASM的其他语言,而不仅仅是Rust。
谢谢,
Dirk 和 VS Code 团队
祝你编码愉快!